How To Remove Overspray Without Damaging a Clear Coat?
In the bustling city of Charleston, SC, where vehicles are as much a display of personal style as they are a means of transportation, maintaining a car’s aesthetic becomes a priority. Auto detailing is more than just a service; it’s an art that ensures your vehicle stands out impeccably. One common issue car owners face is dealing with overspray—those pesky, unintended particles of paint or other substances that settle on a car’s surface. Removing overspray meticulously without damaging the clear coat is crucial for maintaining the car’s showroom shine. This comprehensive guide will walk you through the best practices and methods to remove overspray effectively, preserving your vehicle’s clear coat and integrity.
Understanding Overspray
Overspray refers to any excess spray from painting activities that lands on surfaces not intended to be painted. This can occur during automotive paint jobs, residential or commercial building paint jobs, and even from industrial coatings. The particles can vary in size and composition depending on the source, making them either easy or challenging to remove.
Types of Overspray
- Paint Overspray: Usually from repainting or touch-up jobs.
- Chemical Overspray: From industrial activities, can include harsh substances.
- Dust and Debris Overspray: Often from construction sites, consists of fine particles.
Impact of Overspray on Clear Coat
The clear coat on a vehicle is designed to protect the paint layer beneath from damage, UV light, and environmental pollutants. Overspray can adhere to the clear coat, causing aesthetic and physical damage if not removed properly.
Quote: “Preserving the clear coat is essential not only for the car’s appearance but also for its long-term protection and value.”
Tools and Materials Needed
Before you begin the process of removing overspray, gathering the right tools and materials is crucial. Using the wrong items can lead to further damage, so it’s important to choose wisely.
Table: Recommended Tools and Materials
| Tools/Materials | Purpose |
| Plastic Razor Blades | To gently scrape off large particles without scratching |
| Clay Bar | To remove finer particles and smooth out the surface |
| Lubricant Spray | To aid the clay bar and prevent direct contact with paint |
| Microfiber Towels | For wiping and cleaning without leaving scratches |
| Mild Solvent | To help dissolve stubborn overspray particles |
| Protective Gloves | To protect hands from chemicals and abrasives |
| Bucket with Clean Water | For rinsing away residues |
Step-by-Step Guide to Removing Overspray
Removing overspray effectively requires patience and precision. The following step-by-step guide will help you achieve the best results without compromising the integrity of your car’s clear coat.
Step 1: Assess the Extent of Overspray
Begin by thoroughly assessing how much of your car’s exterior is affected. This will help you determine the amount of time and resources needed for the cleaning process.
Step 2: Wash the Vehicle
Before attempting to remove the overspray, it’s important to wash your vehicle thoroughly to remove any dirt and debris that could cause additional scratches during the overspray removal process.
- Rinse the car with water to remove loose dirt.
- Apply a foam cleanser and gently wash the vehicle using a microfiber cloth.
- Rinse the vehicle again with clean water.
- Dry the car with a clean microfiber towel to prevent water spots.
Step 3: Clay Bar Treatment
Clay barring is a popular method for removing overspray without damaging the clear coat. It involves using a specially designed clay bar and a lubricant to gently pull overspray particles off the surface.
- Knead the clay bar until it’s soft and malleable.
- Spray a generous amount of lubricant on a small section of your car’s exterior.
- Gently glide the clay bar over the lubricated area in a back-and-forth motion.
- Wipe the area with a microfiber towel and check for smoothness.
- Repeat on all affected areas until the overspray is fully removed.
Step 4: Solvent Use for Stubborn Areas
For stubborn overspray that doesn’t come off with the clay bar, a mild solvent can be used. Apply the solvent with caution, using a clean microfiber cloth, and always test on a small, inconspicuous area first to ensure it doesn’t damage the clear coat.
- Apply a small amount of solvent to the microfiber cloth.
- Gently rub the affected area in a circular motion.
- Rinse the area immediately with water to prevent the solvent from sitting too long on the surface.
- Dry with a clean microfiber towel.
Step 5: Final Inspection and Touch-Up
After you’ve removed the overspray, conduct a final inspection to ensure all areas are clean and the clear coat is intact. Use a bright light to highlight any remaining imperfections or residue.
- Walk around the vehicle with a handheld light to inspect the surface from different angles.
- Look for any areas that might have been missed or need a touch-up.
- Repeat the necessary steps (clay bar or solvent application) on any spots that require additional work.
- Ensure the surface is flawlessly clean and smooth.
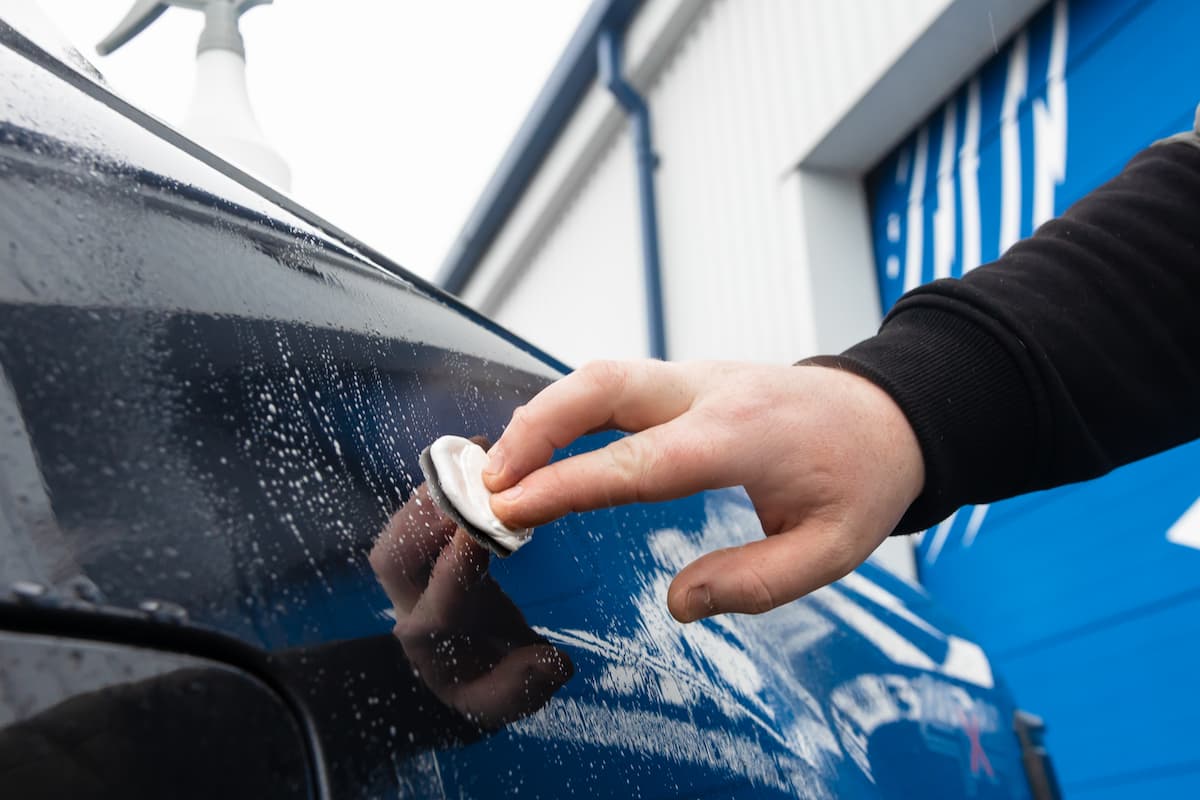
Step 6: Apply a Protective Wax or Sealant
Once the overspray is fully removed and the surface is clean, applying a high-quality car wax or sealant is crucial. This step provides a protective layer that not only enhances the gloss and depth of your car’s paint but also offers additional protection against future overspray and other contaminants.
- Choose a high-quality wax or sealant appropriate for your vehicle’s finish.
- Apply the product using a clean microfiber pad, working in small sections.
- Allow the wax to haze as directed by the product instructions.
- Buff off the haze with a clean, soft microfiber towel until you achieve a glossy finish.
- Inspect the vehicle once more to ensure an even application and outstanding shine.
Preventive Measures for Future Protection
Preventing overspray is as important as knowing how to remove it. Here are several strategies to protect your vehicle during nearby painting activities or in environments prone to overspray:
- Use a Car Cover: Whenever possible, use a high-quality car cover that is designed to block out fine particles. This is especially important if you park outdoors or in an area undergoing construction or painting.
- Regular Waxing and Sealing: Regularly applying wax or sealant can not only keep your car looking new but also provide a slippery surface that minimizes the likelihood of overspray sticking.
- Choose Safe Parking: Avoid parking near painting or construction sites where overspray is likely. Be mindful of the direction of the wind and move your vehicle if necessary.
- Immediate Cleaning: If you suspect your vehicle has been exposed to overspray, clean it immediately. The longer the particles sit, the harder they are to remove and the more they can integrate with your car’s finish.
Professional Auto Detailing Services in Charleston, SC
For those who prefer a professional touch or face particularly stubborn overspray, Charleston boasts several top-tier auto detailing services that specialize in overspray removal and paint correction. Opting for professional services ensures that your vehicle receives the best care with products and techniques that are state-of-the-art.
Why Choose Professional Services?
- Expertise and Experience: Professionals have the expertise and experience to handle different types of overspray without damaging the clear coat.
- Advanced Tools and Products: Auto detailing professionals use high-grade tools and products that are not usually available to the public.
- Guaranteed Results: Most professional services offer a satisfaction guarantee, ensuring that your vehicle looks its best.
Conclusion
Removing overspray without damaging the clear coat is essential for maintaining the aesthetic and resale value of your vehicle. By following the detailed steps outlined in this guide and considering professional detailing services when necessary, you can ensure that your car remains in pristine condition. Remember, prevention is key, so take proactive measures to protect your vehicle from potential overspray situations.
For more information on maintaining your vehicle’s appearance or to book a detailing appointment, visit our detailed services page or contact us directly. Keep your ride looking great with the help of Charleston’s best auto detailing services!
If you’d like further elaboration on any section or additional related topics, feel free to ask!